

앞전까지의 데이터는 하드코딩 그 자체의 데이터이다. 실제로 개발을 하면 데이터는 모두 API 로 받아오게 된다.
하지만 프론트엔드 강의이니 데이터를 다른 파일에 저장해 놓고 그 파일의 데이터를 불러오자.
[{목록1}, {목록2}, {목록3}, ...] 형태의 데이터를 prodData.js 파일에 저장 하자.
각각의 {목록} 데이터에는 id, title, image, content, price 가 들어있다.
Array 형태의 데이터틀에 Object 데이터가 들어있는 형태이다.
위의 id, title .. 등의 값은 Object의 key 값이 되겠다.
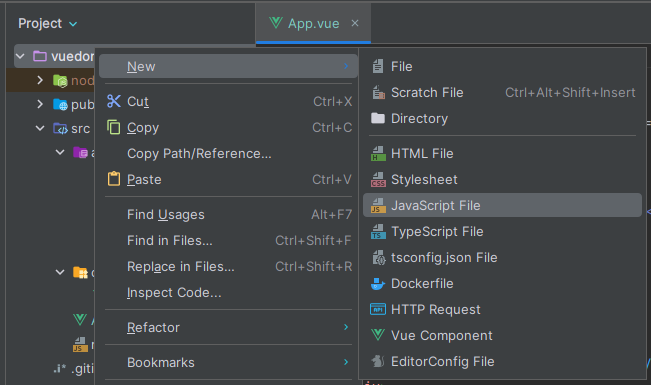
JS file 을 새로 만들고
해당 파일에 긴 데이터를 입력하고 저장하자. <- [{}, {}, {} ...] 형태의 데이터
📢 export default / import 문법
어떤 js 파일에서 만든 변수나 자료를 다른 js 파일에서 사용하고 싶은 경우에 export 와 import 문법을 쓴다.
일단 다른 파일에서 export 해야 다른 파일에서 import 를 할 수 있다.
- export default 는 파일 맨 마지막에 딱 한 번 사용 가능
- import 시 작명은 자유롭게 가능
만약 prodData.js 에 있는 변수를 App.vue 에서 쓰고 싶은 경우에 아래와 같이 작성하면 된다.
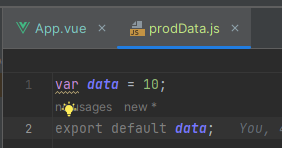
(prodData.js)
var data = 10;
export default data

(app.vue)
import {작명} from 'prodData.js 의 파일경로'
실제로 잘 노출되는 지 확인 해 보자.
(prodData.js 파일은 assets 파일 하위에 위치해있음)
prodData.js 에 export 할 데이터를 셋팅하고
App.vue 파일로 돌아가서
1. import 하기
import data from './assets/prodData.js'
2. 변수 등록하기
data() {
    return {
      products : ['역삼동원룸', '천호동원룸', '마포구원룸'],
      menu : ['Home', 'Shop', 'About'],
      count : [0,0,0],
      isModal : false,
      data : data,
    }
  }
3. 변수 출력하기
{{ data }}
1, 2 번은 script에서 한다.
<script>
import data from './assets/prodData.js'

export default {
  name: 'App',
  // 데이터 저장 공간 (= state)
  data() {
    return {
      products : ['역삼동원룸', '천호동원룸', '마포구원룸'],
      menu : ['Home', 'Shop', 'About'],
      count : [0,0,0],
      isModal : false,
      data : data,
    }
  },
  methods: {
    increase(i) {
      // 함수 내용 입력
      this.count[i]++;
    }
  },
  components: {

  }
}
</script>
출력해보자!
<template>
  {{ data }} <!-- import/export 테스트 출력 -->
   <!-- 모달창 영역 -->
  <div class="black-bg" v-if="isModal === true">
    <div class="white-bg">
      <h4>상세페이지</h4>
      <p>상세페이지내용임</p>
      <button @click="isModal=false">닫기</button>
    </div>
  </div>
  <!-- // 모달창 영역 끝 -->

  <!-- 상단 메뉴 -->
  <div class="menu">
    <a v-for="a in menu" :key="a">{{a}}</a> <!-- Home 3개 출력 -->
  </div>
  <!-- // 상단 메뉴 끝 -->

  <div v-for="(a,i) in products" :key="i">
    <img :src="require(`./assets/room${i}.jpg`)" alt="room_img" class="room-img">
    <h4 @click="isModal = true">{{a}}</h4>
    <p>10만원</p>
    <button @click="increase(i)">허위매물신고</button><br>
    <span>신고수 : {{count[i]}}</span>
  </div>
</template>

10 이라는 데이터가 잘 출력되었다.
export 해야할 것이 많다면? export {} 문법을 사용한다.
export { 데이터1, 데이터2 }
import { 데이터1, 데이터2 ] from 경로
형태로 작성하면 된다.
⚡ 주의1) import 시에는 작명이 불가하고 export 했던 데이터명을 그대로 적어야 한다.
⚡ 주의2) export 할 때 default 는 빼야 함
<script>
import {data1, data2} from './assets/prodData.js'

export default {
  name: 'App',
  // 데이터 저장 공간 (= state)
  data() {
    return {
      products : ['역삼동원룸', '천호동원룸', '마포구원룸'],
      menu : ['Home', 'Shop', 'About'],
      count : [0,0,0],
      isModal : false,
      data1 : data1,
      data2 : data2
    }
  },
  methods: {
    increase(i) {
      // 함수 내용 입력
      this.count[i]++;
    }
  },
  components: {

  }
}
</script>
출력해 보면 잘 나오는 것을 확인할 수 있다.

위에 배운 것을 적용해서 prodData.js 에 화면에 노출 시킬 데이터들을 저장한 후, App.vue 파일에서 improt 해보자.
나는 pordList 라는 작명으로 import 해왔다.
(상품이 6개 이므로 count : [0,0,0,0,0,0] 으로 초기화 했다 / 좀 더 최적화 할 수 있지만 일단 pass)
<script>
import prodList from './assets/prodData.js'

export default {
  name: 'App',
  // 데이터 저장 공간 (= state)
  data() {
    return {
      products : ['역삼동원룸', '천호동원룸', '마포구원룸'],
      menu : ['Home', 'Shop', 'About'],
      count : [0,0,0,0,0,0],
      isModal : false,
      prodList : prodList
    }
  },
  methods: {
    increase(i) {
      // 함수 내용 입력
      this.count[i]++;
    }
  },
  components: {

  }
}
</script>
참고로 data () {} 영역에 있는 prodList : prodList 는 prodList 로 축약할 수 있다.
data() {
    return {
      products : ['역삼동원룸', '천호동원룸', '마포구원룸'],
      menu : ['Home', 'Shop', 'About'],
      count : [0,0,0],
      isModal : false,
      prodList
    }
  }
이제 import 해온 데이터들을 활용해여 실제 화면으로 뿌려보자!
하드코딩 해놓았던 데이터는 지웠다.
vue 의 데이터바인딩 문법을 활용하여 데이터 노출만 잘 시키면 된다.
prodData.js 의 데이터는 Array 형식으로 되어 있으니, for 문을 활용한다.
<div v-for="(a,i) in prodList" :key="i">
    <img :src="`${a.image}`" alt="room_img" class="room-img">
    <h4 @click="isModal = true">{{a.title}}</h4>
    <p>{{a.price}}원</p>
    <button @click="increase(i)">허위매물신고</button><br>
    <span>신고수 : {{count[i]}}</span>
  </div>
잘 노출된다

'Vue3 > 코딩애플 part1' 카테고리의 다른 글
| [Vue/코딩애플/part1] 7. 컴포넌트(Component) / 컴포넌트 파일명 한 단어로 가능하게 하는 방법 (0) | 2024.07.29 |
|---|---|
| [Vue/코딩애플/part1] 6. 모달창에 상세 페이지 만들기 / v-if, v-else, v-else-if 문 (0) | 2024.07.29 |
| [Vue/코딩애플/part1] 4. Vue 에서 모달창 만들기 (0) | 2024.07.24 |
| [Vue/코딩애플/part1] 3. 이벤트 핸들러로 click 감지하기 (2) | 2024.07.24 |
| [Vue/코딩애플/part1] 2. Vue 반복문 v-for (4) | 2024.07.24 |